
Fastfetch: Fast, Modern & Customizable System Information Tool
A free and open-source system information tool, it quickly displays useful details about your computer directly in the terminal. It can show information such as your operating system, CPU, GPU, memory, disk, and more. Like Neofetch, Fastfetch works on Linux, Windows, macOS, Android, and BSD systems, though platform and package availability can vary.
When you want a quick overview of your system, it brings key details together in a single terminal output. You can choose what to display and customize the output, making it useful for checking system details without digging through multiple settings or commands.
2.70.0
Latest stable release
Oct 14, 2026
Release date
5 platforms
Linux, macOS, Windows, Android, BSD
Free
Open source, no cost
What is Fastfetch?
A command-line tool that displays system information in a clear and customizable format. Instead of showing every available detail, you can select the information relevant to a particular task, such as reviewing a machine before troubleshooting or checking its hardware and software setup.
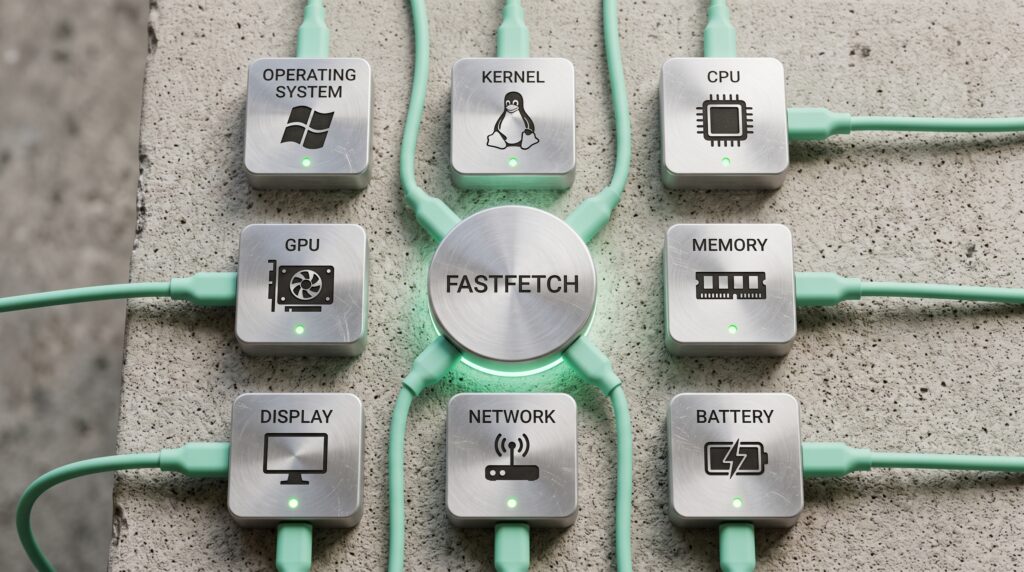
What it can show
Release Information
The latest stable version of Fastfetch is v2.70.0, released on October 14, 2026. It is available for Linux, macOS, Windows, Android, BSD, and other supported platforms.
| Platform | Installation methods |
|---|---|
| Linux | Package manager, .deb, Linuxbrew |
| macOS | Homebrew, MacPorts, Archive |
| Windows | WinGet, Scoop, Chocolatey, MSYS2, Archive |
| BSD | BSD package managers |
| Android | Termux package manager |
What’s New in FastFetch?
Several useful updates have been added for showing system information. These changes improve scripting, configuration, media cover art, logos, and system detection. Here are some of the new things you can use:
How to Download and Install Fastfetch?
Installation options vary by operating system. Most platforms provide it through a package manager, while manual downloads are available when a suitable package is not available.
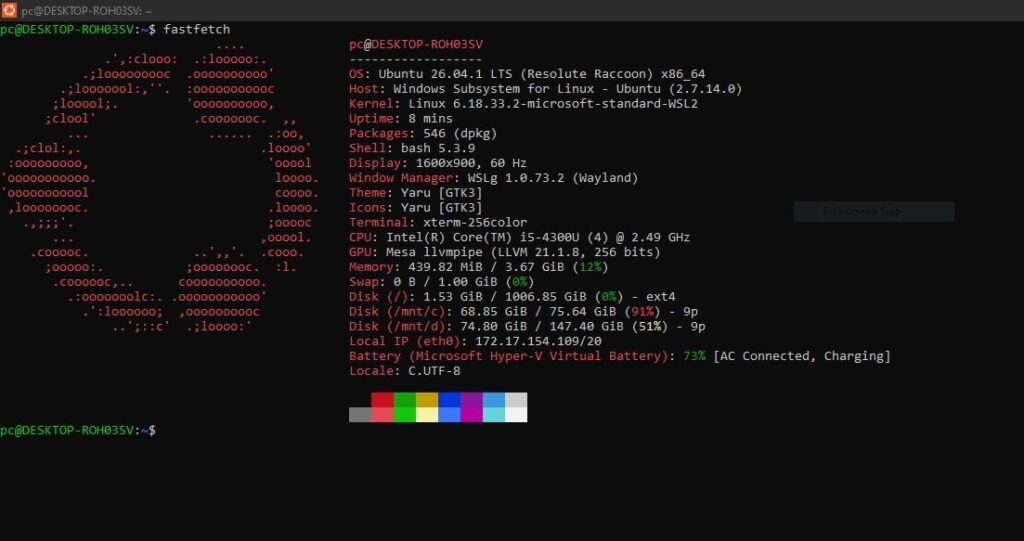
Choose your platform below and follow the corresponding installation method.
Linux users can install Fastfetch through their distribution’s package manager or use a suitable package from the official releases when needed.
Windows users can install Fastfetch through WinGet, Scoop, Chocolatey, MSYS2, or a prebuilt archive from the official releases.
macOS users can install it through Homebrew or MacPorts. You can also download a manual release if you prefer.
Package managers provide access to Fastfetch on several BSD systems.
| BSD System | Installation Command |
|---|---|
| FreeBSD | pkg install fastfetch |
| NetBSD | pkgin install fastfetch |
| OpenBSD | pkg_add fastfetch |
| DragonFly BSD | pkg install fastfetch |
OpenBSD and DragonFly BSD packages may be available through snapshot repositories rather than regular stable releases.
Android users can install it through Termux.
- Open Termux.
- Update the available package information if needed.
- Install:
pkg install fastfetch - After installation, run:
fastfetch
The available system information will then appear directly in the Termux terminal.
Verify Your Installation
After installing, verify that the command is available before moving on to configuration or customization.
To check the installed version, run:
fastfetch --versionYou can also launch Fastfetch directly:
fastfetchWhen the command runs successfully and displays system information, the installation is complete.
What Are the Key Features of Fastfetch?
Fastfetch combines speed, flexibility, and structured output in a single tool. It displays detailed system information almost instantly, while giving you full control over what’s shown and how it looks.
Fast Performance
System information is displayed quickly while keeping resource usage low. Its lightweight design helps it start quickly and keeps terminal output responsive.
System Information
Common system details are brought together in a single terminal output. Depending on the available modules, you can view information about the operating system, kernel, CPU, GPU, memory, storage, display, network, battery, and other hardware.
Modular System Information
Modules control which system details appear in the output. Fastfetch includes a wide range of built-in modules, so you can select exactly the ones you need instead of displaying every available detail.
Customizable Display
You can change the order and selection of modules and adjust the layout, colors, logos, and other display settings. This lets you create an output that matches your preferences.
Logo Support
You can display operating system and system logos alongside system information. It supports text logos and image-based logos on compatible terminals.
Easy Configuration
Fastfetch uses JSONC configuration files, with an official JSON Schema for editor autocomplete and validation, to control the output’s modules, layout, colors, and logos. The --gen-config option creates a starting configuration through an interactive prompt.
Built-in Presets
Ready-made configurations are included for different output styles. You can use a preset as a starting point and customize it for your needs.
JSON Data Export
System information can be output in JSON format, which is useful when scripts or other tools need to process the data.
fastfetch --format jsonWatch Mode
A watch mode can repeatedly update the displayed system information. This is useful when you want to monitor changing system details from the terminal.
How to Use Fastfetch: Command Syntax
Once installed, you can run the tool from your terminal with different options to control what it displays. Start with the basic command, then use specific modules or options when you need a different output.
Run It
Open your terminal or command prompt and run:
● ● ●
fastfetchPress Enter to display your system information. It will show the information provided by its current configuration.
Choose What to Display
You can limit the command output by specifying the information you want it to show. For example:
● ● ●
fastfetch -s OS:Kernel:CPU:GPU:MemoryThis displays only the selected information, not the full default output.
Hide the Logo
To display your system information without a logo, use:
● ● ●
fastfetch -l noneThis removes the logo while keeping the system information.
Check Available Commands
To view the available options and command-line arguments, run:
● ● ●
fastfetch --helpThis is useful when you want to check what a specific option does or see which commands are available.
Create a Configuration
Generate a starter configuration file with:
● ● ●
fastfetch --gen-configThis opens an interactive prompt to choose your setup, then creates the configuration file so you can adjust it further.
How to Update or Uninstall Fastfetch?
If you already have it installed, you can update or remove it with the package manager you used to install it. Follow the steps for your operating system below.
For APT installations, start by refreshing the package information:
Update
- Open the Applications menu, search for Terminal, and open it.
- Type the following command and press Enter:
sudo apt update
This refreshes the package information so APT can check for available updates. - Wait for the command to finish. If it asks for your password, enter it and press Enter.
- Run the following command to apply an available package update:
sudo apt install --only-upgrade fastfetch - If APT displays a confirmation prompt, review the changes and continue as instructed.
Uninstall
When you no longer need the package:
- Open Terminal and enter:
sudo apt remove fastfetch - Press Enter and review the packages listed for removal.
- To confirm, type Y and press Enter.
On Arch Linux, pacman handles package management.
Update
- Open your terminal from the desktop or application menu.
- Enter the following command and press Enter:
sudo pacman -Syu fastfetch
This synchronizes the package database and applies available package updates. - Enter your password if requested.
- Review the changes pacman shows and confirm the operation when prompted.
- Allow the process to finish before closing the Terminal.
Uninstall
For removal:
- Run:
sudo pacman -R fastfetch - Review the packages listed for removal.
- Confirm the operation when prompted and wait for pacman to finish.
Fedora uses DNF for package management.
Update
- Open Terminal from the application menu.
- Enter this command and press Enter:
sudo dnf upgrade fastfetch
This checks for available package updates and applies them. - Enter your password if requested.
- Review the changes shown by DNF.
- Confirm the operation when prompted, and let it finish.
Uninstall
When you want to remove the package:
- Run:
sudo dnf remove fastfetch - Review the removal list.
- Confirm the operation and wait for DNF to complete.
For Homebrew installations:
Update
- Open Terminal from Applications > Utilities.
- Refresh Homebrew’s package information:
brew update - Wait for the check to finish, then run:
brew upgrade fastfetch
This applies to the available package update. - Let Homebrew finish before closing Terminal.
Uninstall
If you want to remove it later:
- Open Terminal.
- Enter:
brew uninstall fastfetch - Press Enter and wait for Homebrew to finish removing it.
For WinGet installations, use PowerShell or Command Prompt.
Update
- Open the Start menu and search for PowerShell or Command Prompt.
- Open the application and enter:
winget upgrade fastfetch - Press Enter. WinGet will check for an available package update.
- Review the information shown and confirm the operation if prompted.
Uninstall
When you want to remove the package:
- Open PowerShell or Command Prompt.
- Run:
winget uninstall fastfetch - Review the package information and confirm the removal if required.
- Wait for WinGet to finish.
A manually installed copy doesn’t use a package manager, so you must replace the existing executable when a newer release is available.
Update
- Download the newer Fastfetch release.
- Locate the folder containing the current executable.
- Replace the old file with the new one.
- Open Terminal and run:
fastfetch - If the program starts normally, the replacement was successful.
Uninstall
To remove a manually installed copy:
- Open Terminal and find the executable’s location:
which fastfetch - Press Enter to display its path.
- Open that location and delete the Fastfetch executable.
Why Choose Fastfetch: Performance Comparison
A lightweight design, flexible configuration, and structured output make it a practical choice for viewing system information. Compared with other system information tools, it offers more control over how you select, display, and export details.
| Feature | Fastfetch | Neofetch | Screenfetch | Macchina | Hyfetch |
|---|---|---|---|---|---|
| Module Selection | Yes | Yes | Limited | Yes | Yes |
| JSONC Config | Yes | No | No | No | No |
| Image Logos | Yes | Limited | No | Yes | Limited |
| JSON Export | Yes | No | No | Yes | No |
| Terminal Control | High | Moderate | Basic | High | High |
| Detailed Hardware Info | Yes | Yes | Basic | Yes | Yes |
| Configuration Generator | Yes | No | No | Limited | No |
Feature comparison is based on publicly available documentation as of September 2026 and may vary by version.
For users who want a modern alternative to traditional system information tools, Fastfetch provides a wider range of output and configuration options in one application. Its support for structured output and configuration generation also makes it a practical choice for users who want to build a consistent terminal setup.
Frequently Asked Questions
Quick answers about installing and using Fastfetch.
Conclusion
A flexible approach to terminal-based system overviews makes it useful across supported platforms. Configurable modules and structured output let you use it for quick checks and more tailored command-line workflows.
After installation, you can choose what information to display, adjust the configuration, and select different modules to create an output that fits your needs.
Disclaimer: This website is an independent resource created only for informational and educational purposes. It is not affiliated with, supported by, or officially connected to Fastfetch, its developers, or related organizations. We do not claim ownership of the software or its trademarks.
All download links lead to the original repositories or trusted sources. This website does not host software files unless they are freely available under their original license.